
Description
Technical Parameters
Closed tray dental transfer technique
Use Dental Transfer to create an implant-level imprint for a single or many units in order to fabricate a functioning cast using a closed-tray, indirect transfer method. Select the emergence that coincides with the healing abutment's emergence (narrow, regular or wide). Through this process, a model that accurately depicts the implant's location, the hex's orientation, and the soft tissue profile is produced.
Dental Transfer Component options
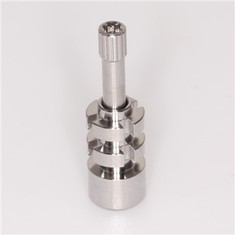
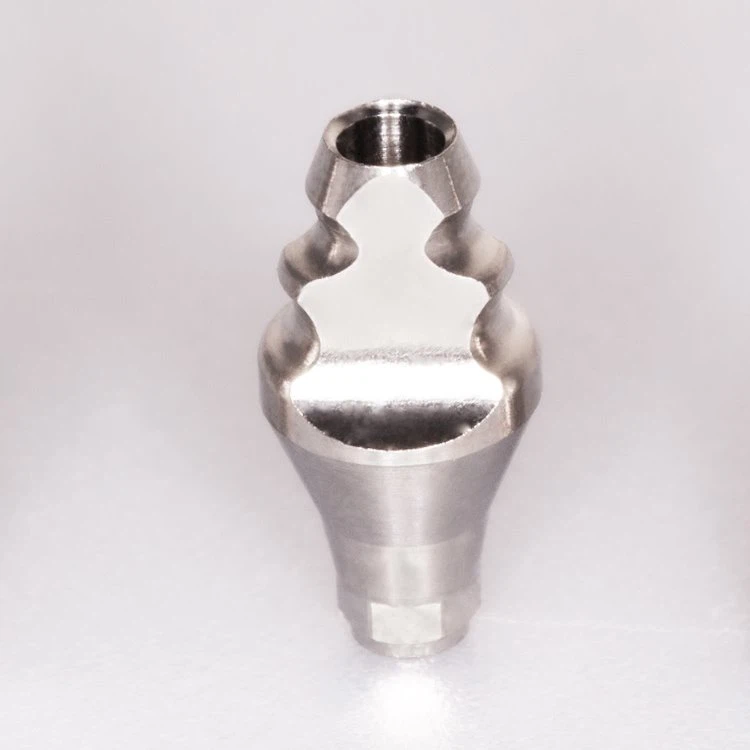
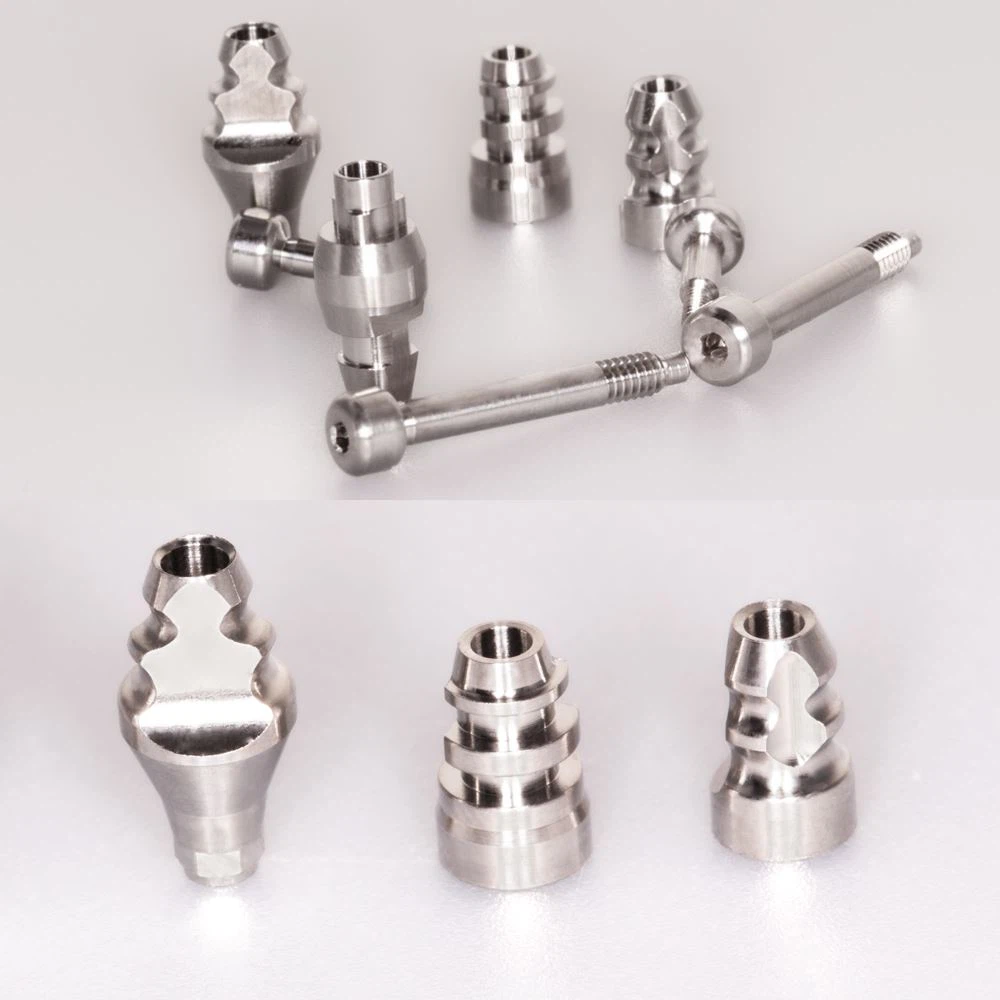
● Indirect scoop coping
● 3-in-1 abutment
● Ball-top screw
● Implant analog
● Hex driver, 1.25mm
1. Remove the healing abutment
Apply a 1.25mm hex driver to the healed abutment and remove it. Verify that there are no soft tissues or bone fragments on the implant prosthetic platform.
2. Place the dental transfer
Option A: Place the indirect scoop coping in place and fasten it with the supplied screw. Hand cinch.
Option B: Place the 3inOne abutment in place and tighten it down with the ball-top screw. Hand cinch.
To confirm that the dental transferor 3inOne abutment is fully seated into the hex of the implant, take a radiograph along the implant's long axis.
3. Block out the hex
Use a suitable material to fill the hex hole on top of the indirect scoop coping screw or the ball top screw.
4. Make a full-arch impression
Syringe a medium or heavy body elastomeric impression material around and over the indirect scoop coping or the 3inOne abutment and ball top assembly. Load the tray with impression material and make the impression.
Remove the tray from the mouth when the impression material has had time to set. The 3inOne abutment/ball top screw or indirect scoop coping will stay in the mouth.
5. Remove the impression copings
Once the impression material has had time to set, take the tray out of your mouth. The indirect scoop coping or 3in1 abutment/ball top screw will remain in the mouth.
6. Lab step - Assemble the analog
Option A: Use the correct implant analog diameter and coping screw to attach the indirect scoop coping.
Option B: Use a ball-top screw to affix the 3inOne abutment using the proper implant analog diameter.
7. Lab step - Index the copings
By placing the coping assembly in the corresponding spot in the imprint, you can index the coping into the impression.
Option A: Use the matching indices in the impression to position the indirect scoop coping.
Option B: Use the long flat to position the 3inOne abutment.
8. Lab step - Make a soft tissue model
Make that the analog and coping assembly is entirely and correctly installed. Wherever the soft tissue replica material is to be placed, lubrication should be added. Wrap the analog with a soft tissue imitation using a syringe.
9. Lab step - Fabricate the stone model
Make a functioning model out of high-hardness, low-expansion die stone. Communicate using the standard laboratory etiquette.
Dental transfer Compatible system as below

Dental transfer Pictures
Dental CAD/CAM System Workflow

Certifications

Packing & Delivery

Company Profile


Exhibition

Hot Tags: dental transfer, China, suppliers, manufacturers, factory, wholesale, buy, price, for sale, made in China
Previous
Closed Tray Impression CopingSend Inquiry